 UpParser
How to Convert PDF Invoices to Excel: A Step-by-Step Walkthrough
Convert a PDF invoice to Excel in four simple steps. Follow screenshots, check the workbook, and prepare reviewed data for QuickBooks, Xero, or another accounting app.
Quick Answer
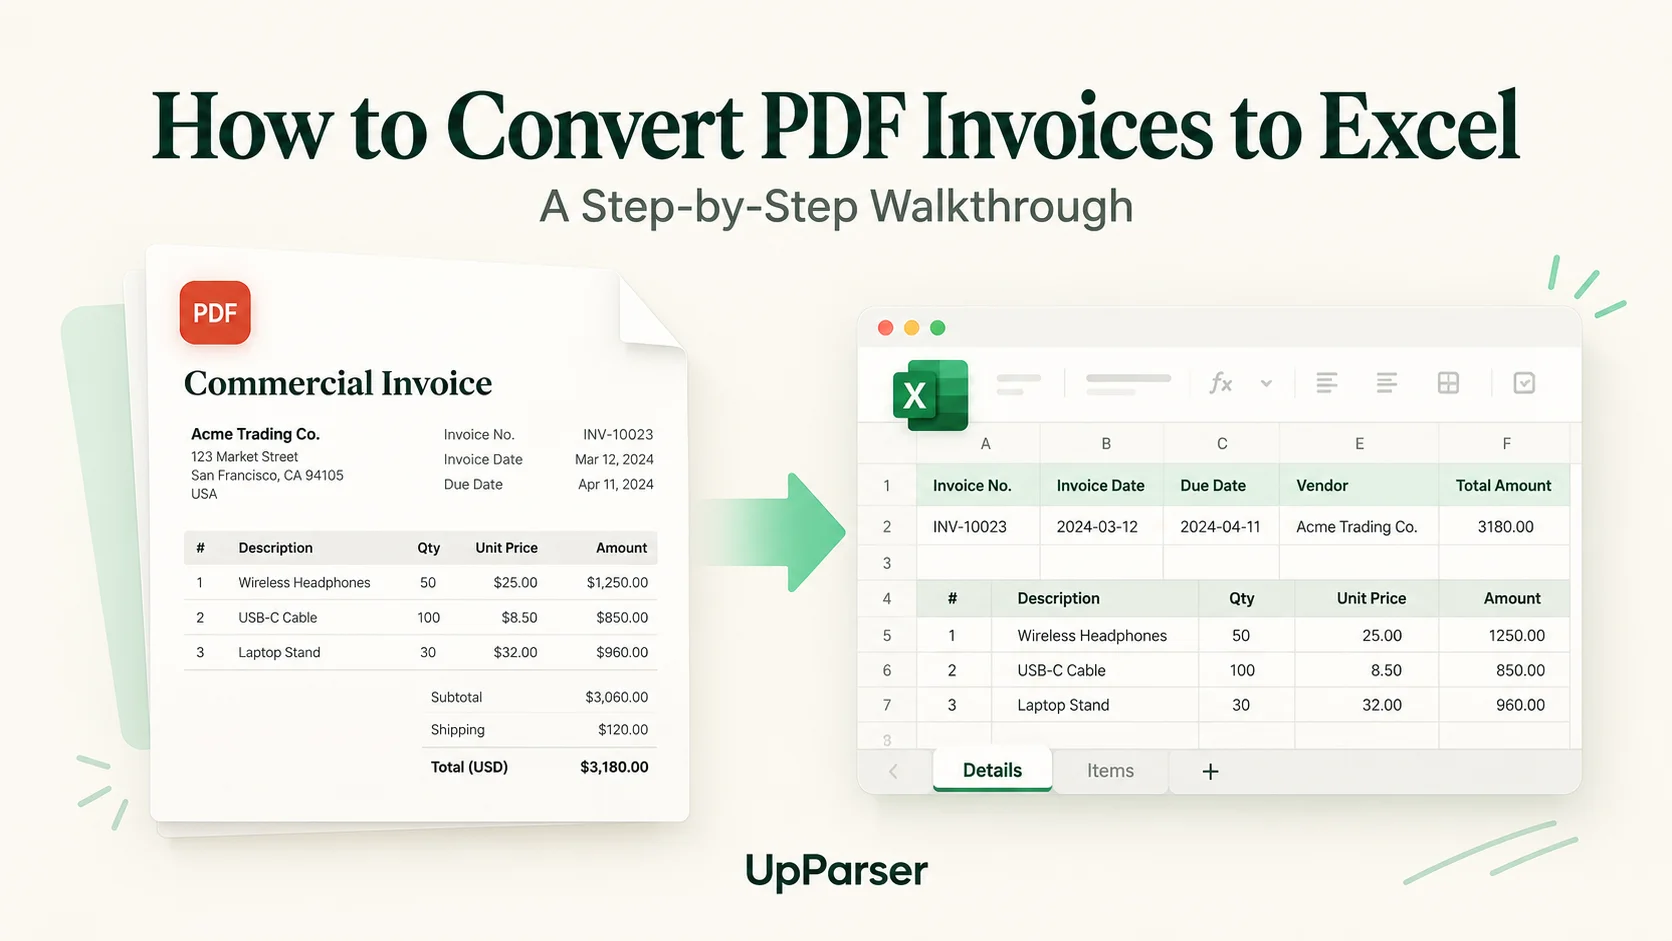
Upload your PDF invoice to UpParser, check the result beside the original, and download it as Excel. Open the workbook to check its columns before using it.
Below is a four-step walkthrough with screenshots, followed by optional steps for preparing the file for QuickBooks, Xero, or another accounting app.
What Your Excel File Should Contain
A PDF preserves a page layout rather than spreadsheet structure. A digital invoice can contain selectable text, while a scanned invoice may contain only an image. Neither automatically provides the rows, columns and field relationships you need in Excel. Copying or importing the page can therefore produce scattered cells, merged columns or a single column of text.
Invoices make this harder in a few specific ways:
- Main details and a product list. Main invoice details such as supplier and date appear once. Line items repeat in rows. A spreadsheet needs them organized differently.
- Different layouts. Every supplier designs invoices their own way, so a fixed copy-and-paste routine rarely survives for long.
- Mixed content. Stamps, logos, notes in more than one language and handwritten marks sit next to the data you want.
- Scans and photos. If the PDF is a scan, there is no text to copy until it is recognized.
The Main Ways to Convert a PDF Invoice to Excel
| Method | Works best for | Where it struggles |
|---|---|---|
| Copy and paste | One or two simple invoices | Slow, easy to misalign columns, errors creep in |
| Open the PDF in a word processor or document editor, then copy | Text-based PDFs with clean tables | Layout breaks; scans are not readable |
| Excel Power Query PDF import, where available | Digital PDFs with detectable tables | Availability depends on Excel edition and platform; review and reshape the imported tables |
| General PDF-to-Excel converters | Whole-page table conversion | Layout-focused output may mix main invoice details and line items; capabilities vary by tool |
| Basic OCR tools | Scans and photos | Text recognition alone does not organize invoice fields; some OCR products also include structured extraction |
| AI document parsers | Repeated invoices, mixed layouts, scans | Need a quick check of results, as any extraction tool does |
Excel users can also review Microsoft’s PDF connector documentation and connector availability by Excel version.
The key difference is between converting a file and extracting data. A converter changes the format. An extraction tool identifies what each value is, so the supplier lands in a Supplier column and each line item lands in its own row.
What to Check Before Converting an Invoice
Before uploading, check three things:
- The file is readable and complete. Include every page, especially the totals on the last page.
- You know what you need. For most invoices, start with supplier, invoice number, date, tax, total, and the product list.
- You can check the result. Keep the original nearby and confirm the current upload limits on screen.
A scanned PDF may need more careful checking of small numbers and decimal points. For preparation tips, see scanned invoices and photos.
Step-by-Step: Convert a PDF Invoice to Excel With UpParser
You can do this in your browser. No coding or spreadsheet formulas are needed to get started.
Step 1: Open the tool and upload
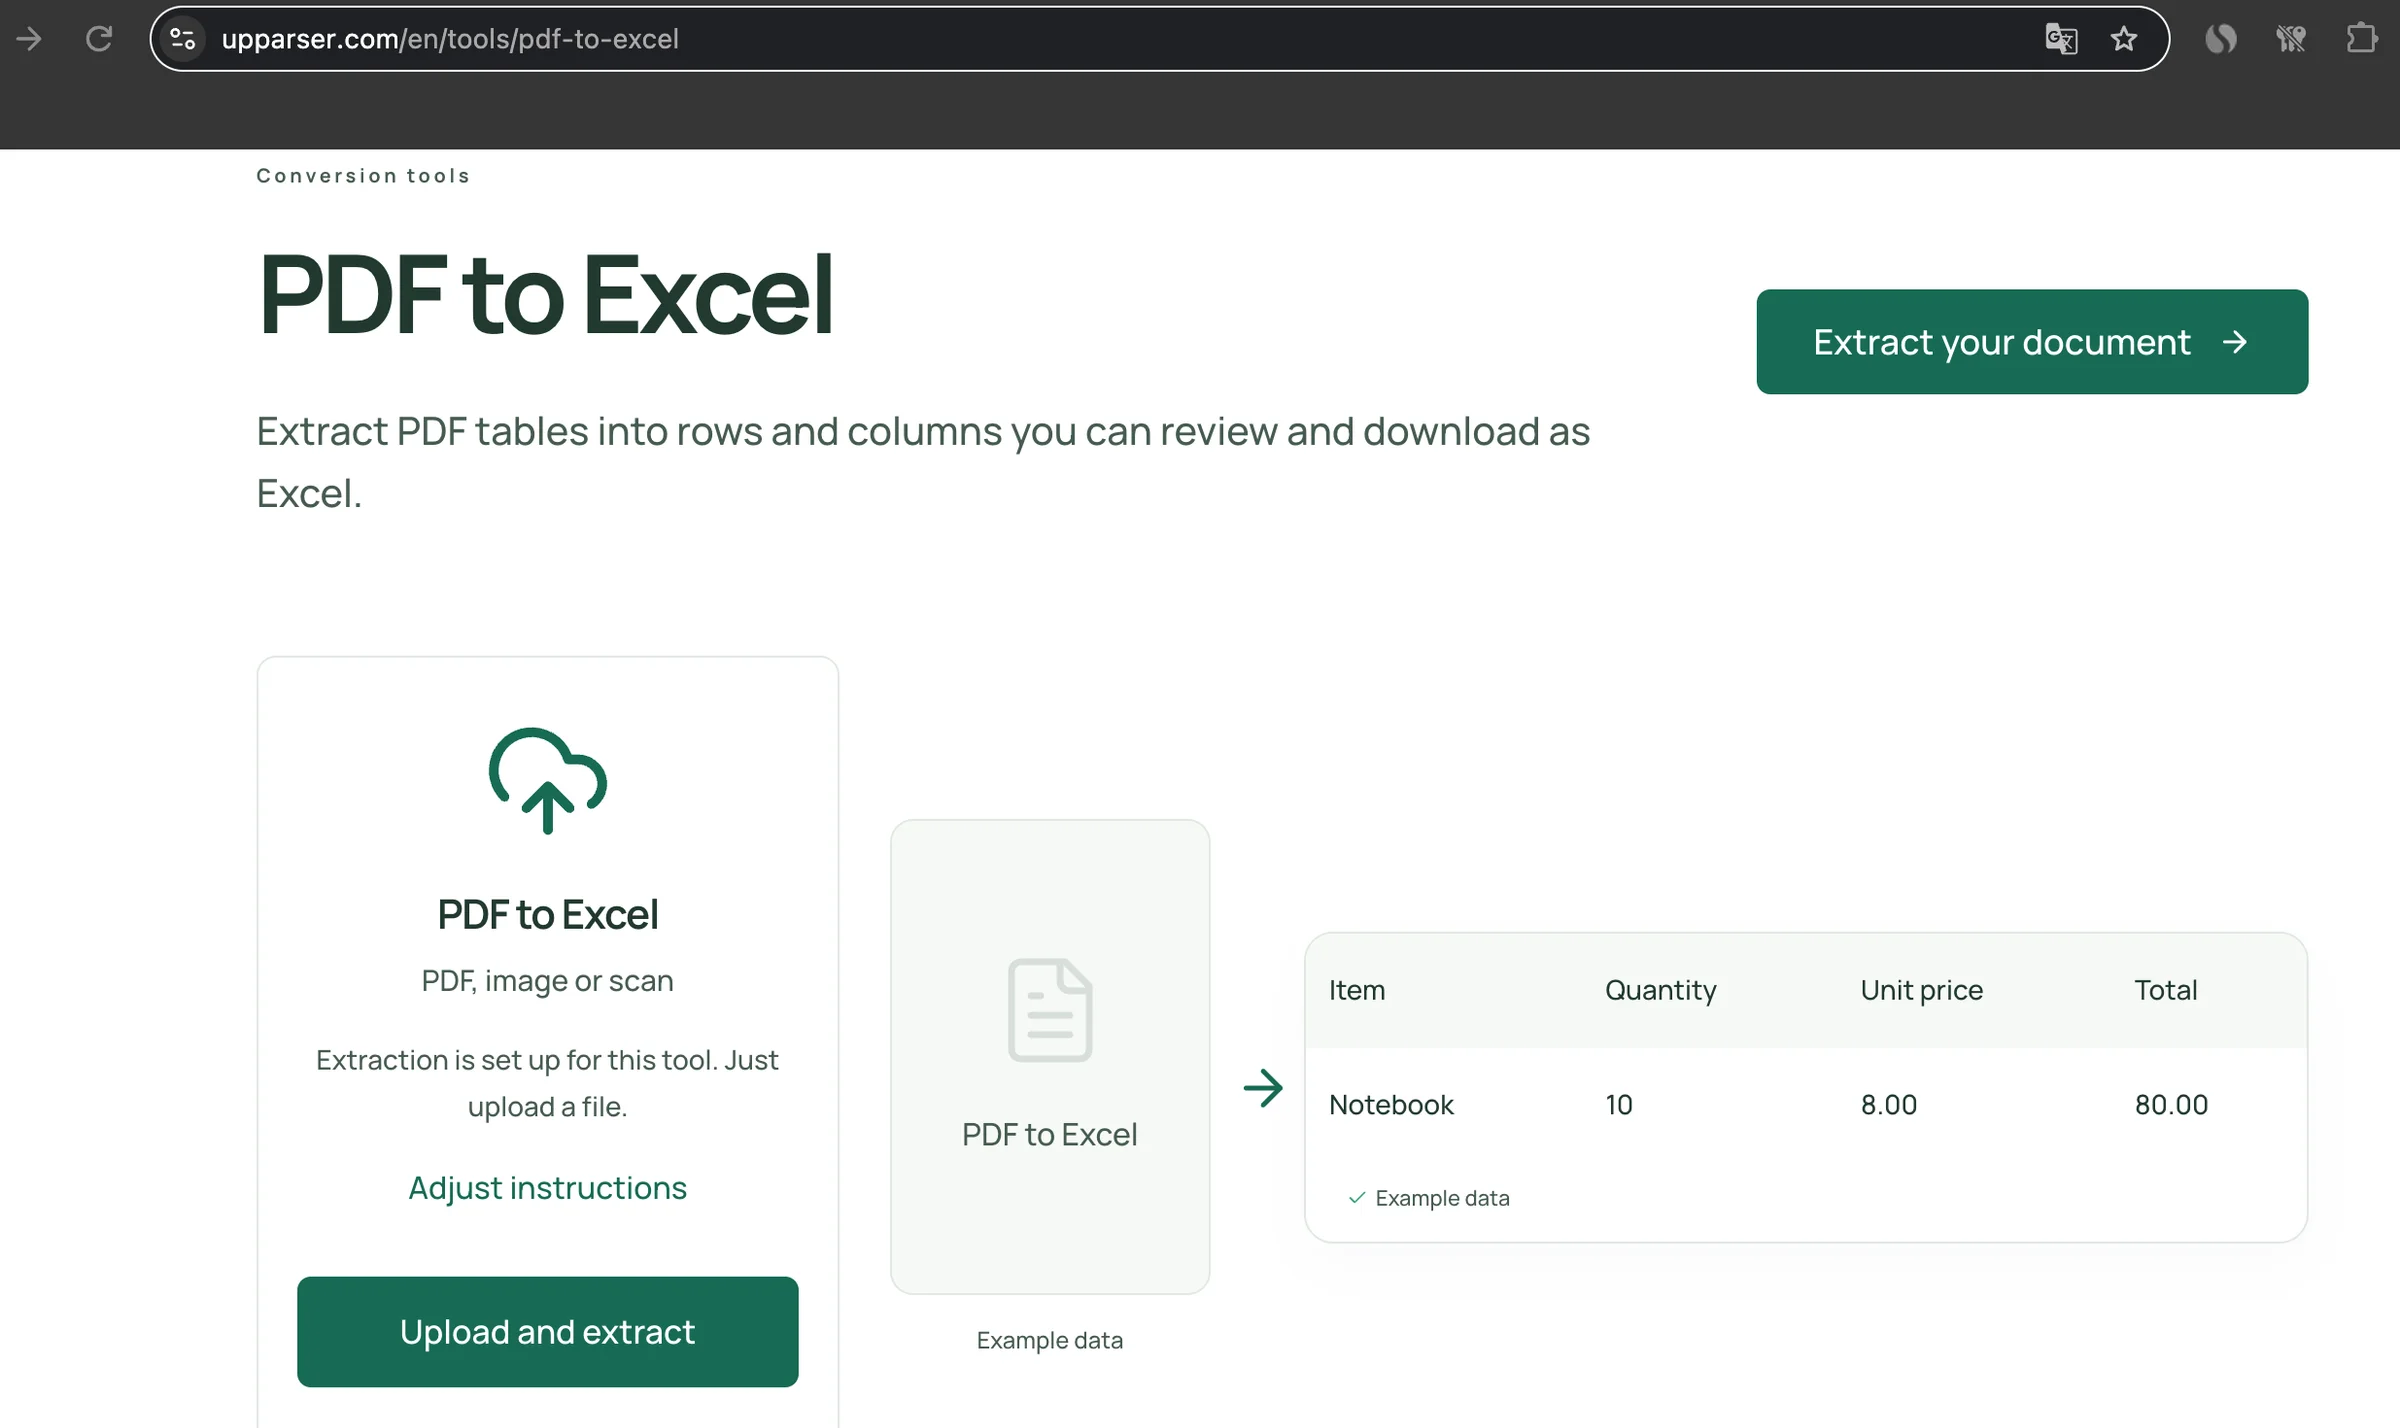
Open UpParser's PDF to Excel tool, click Upload and extract, and choose your PDF. Sign in if asked.
The preset gives you a starting point. If you want something extra, click Adjust instructions and write a short request, such as:
Get the supplier, invoice number, date, tax, total, and a product list with quantity, unit price, and amount. Leave missing details blank.
Step 2: Check the result beside the invoice
When processing finishes, compare the original on the left with the result on the right. Check the supplier, reference number, date, currency, total, and every product row. Use Edit data to correct a wrong value.
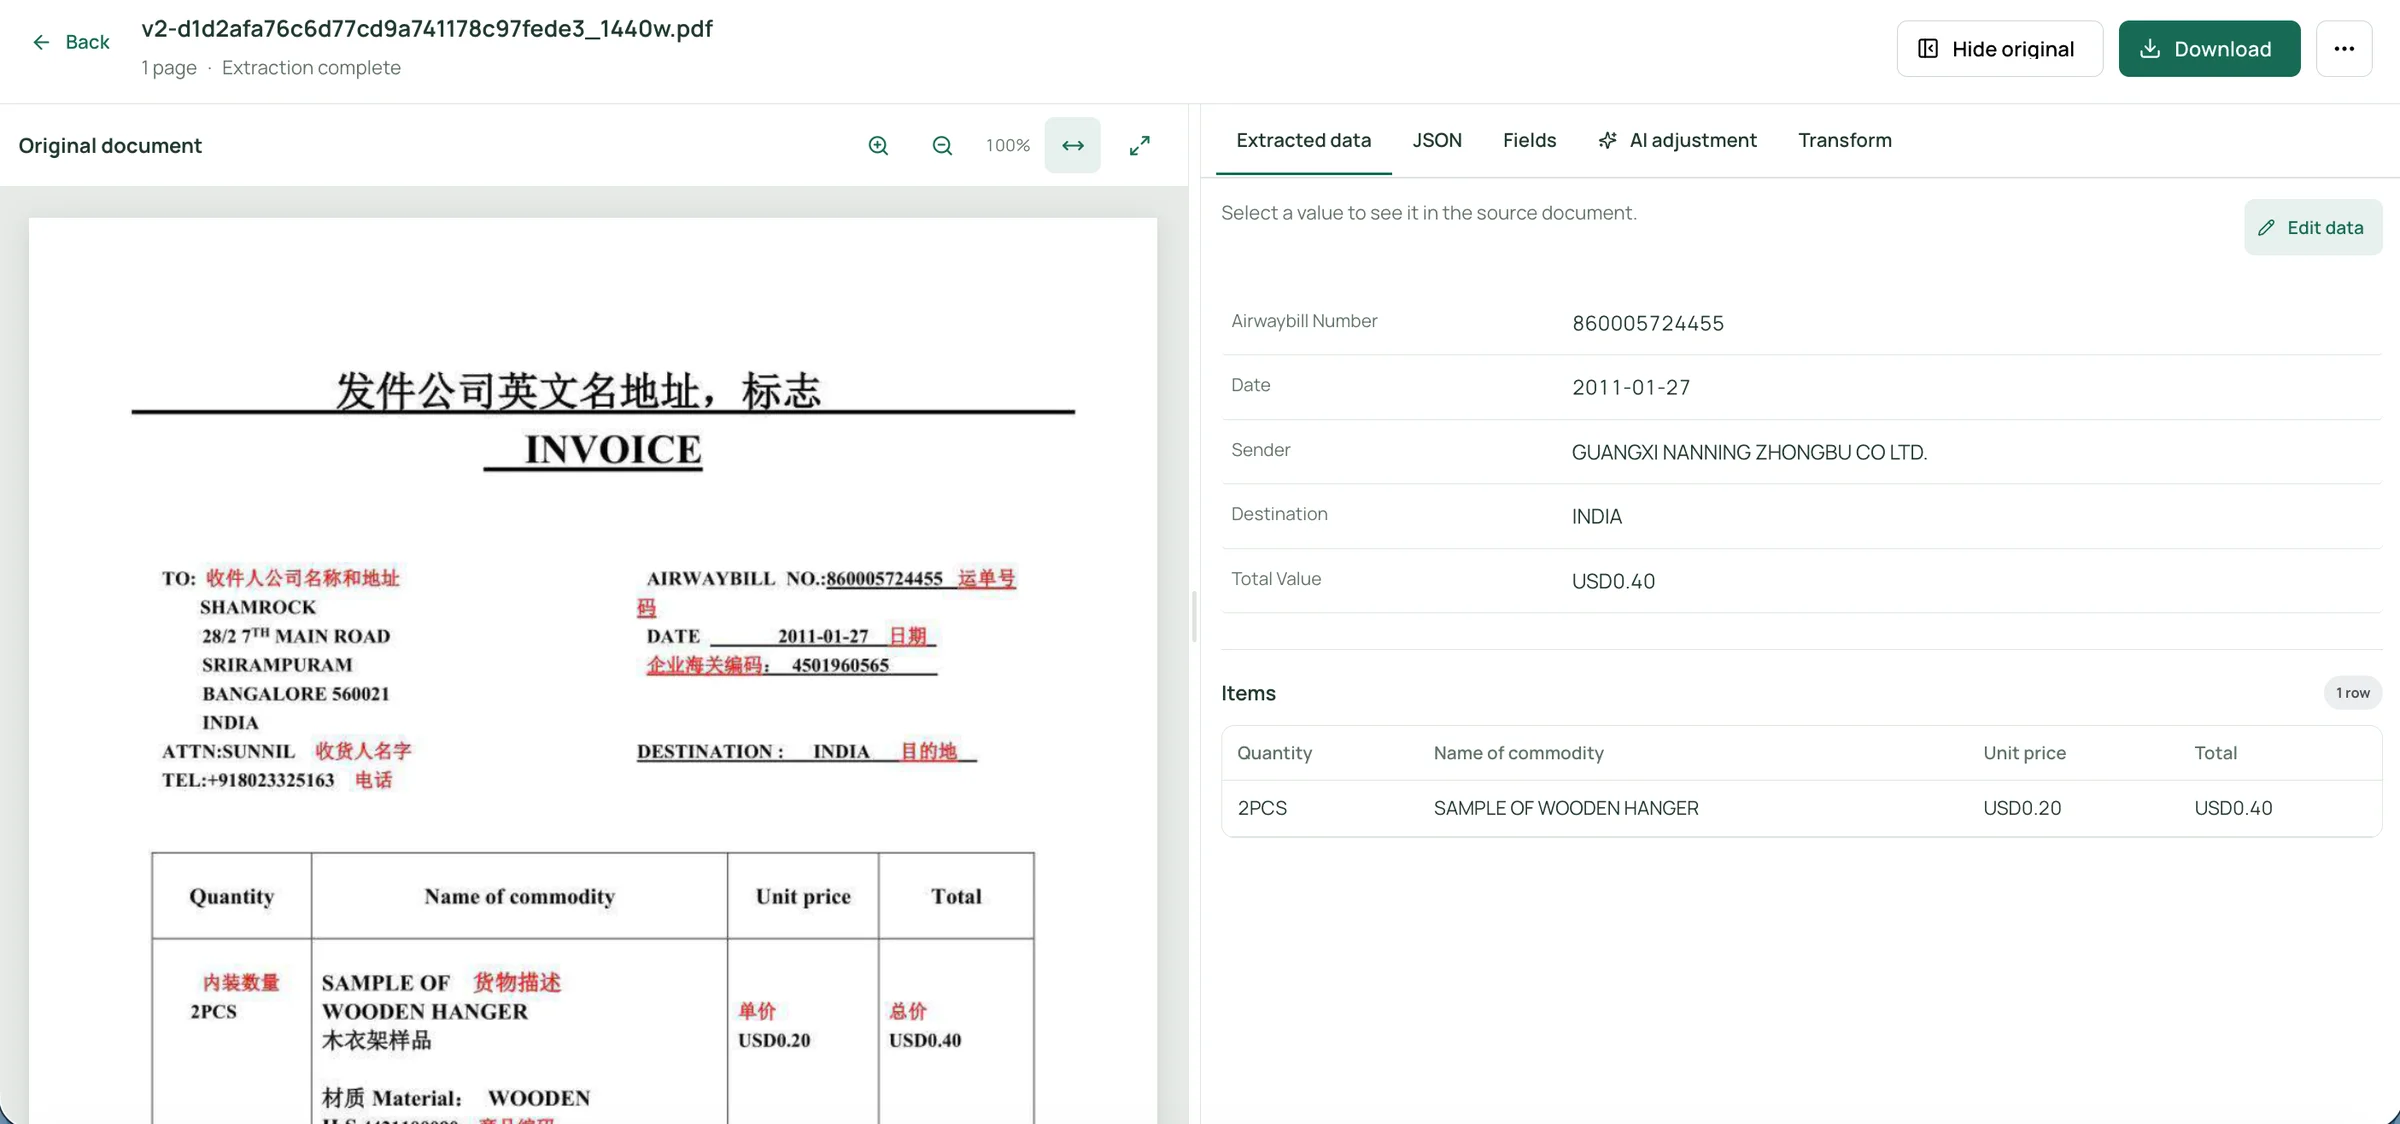
The sample above is a customs invoice. It shows an airwaybill number 860005724455, date 2011-01-27, and a wooden-hanger sample: 2 pieces × USD 0.20 = USD 0.40. The airwaybill number identifies a shipment; the USD 0.40 is the declared customs value. Keep those labels rather than turning them into an invoice number or an amount to pay.
If something is missing, open AI adjustment and describe it in one sentence—for example, “Also include the destination country.” Check the preview before accepting it.
Step 3: Download as Excel
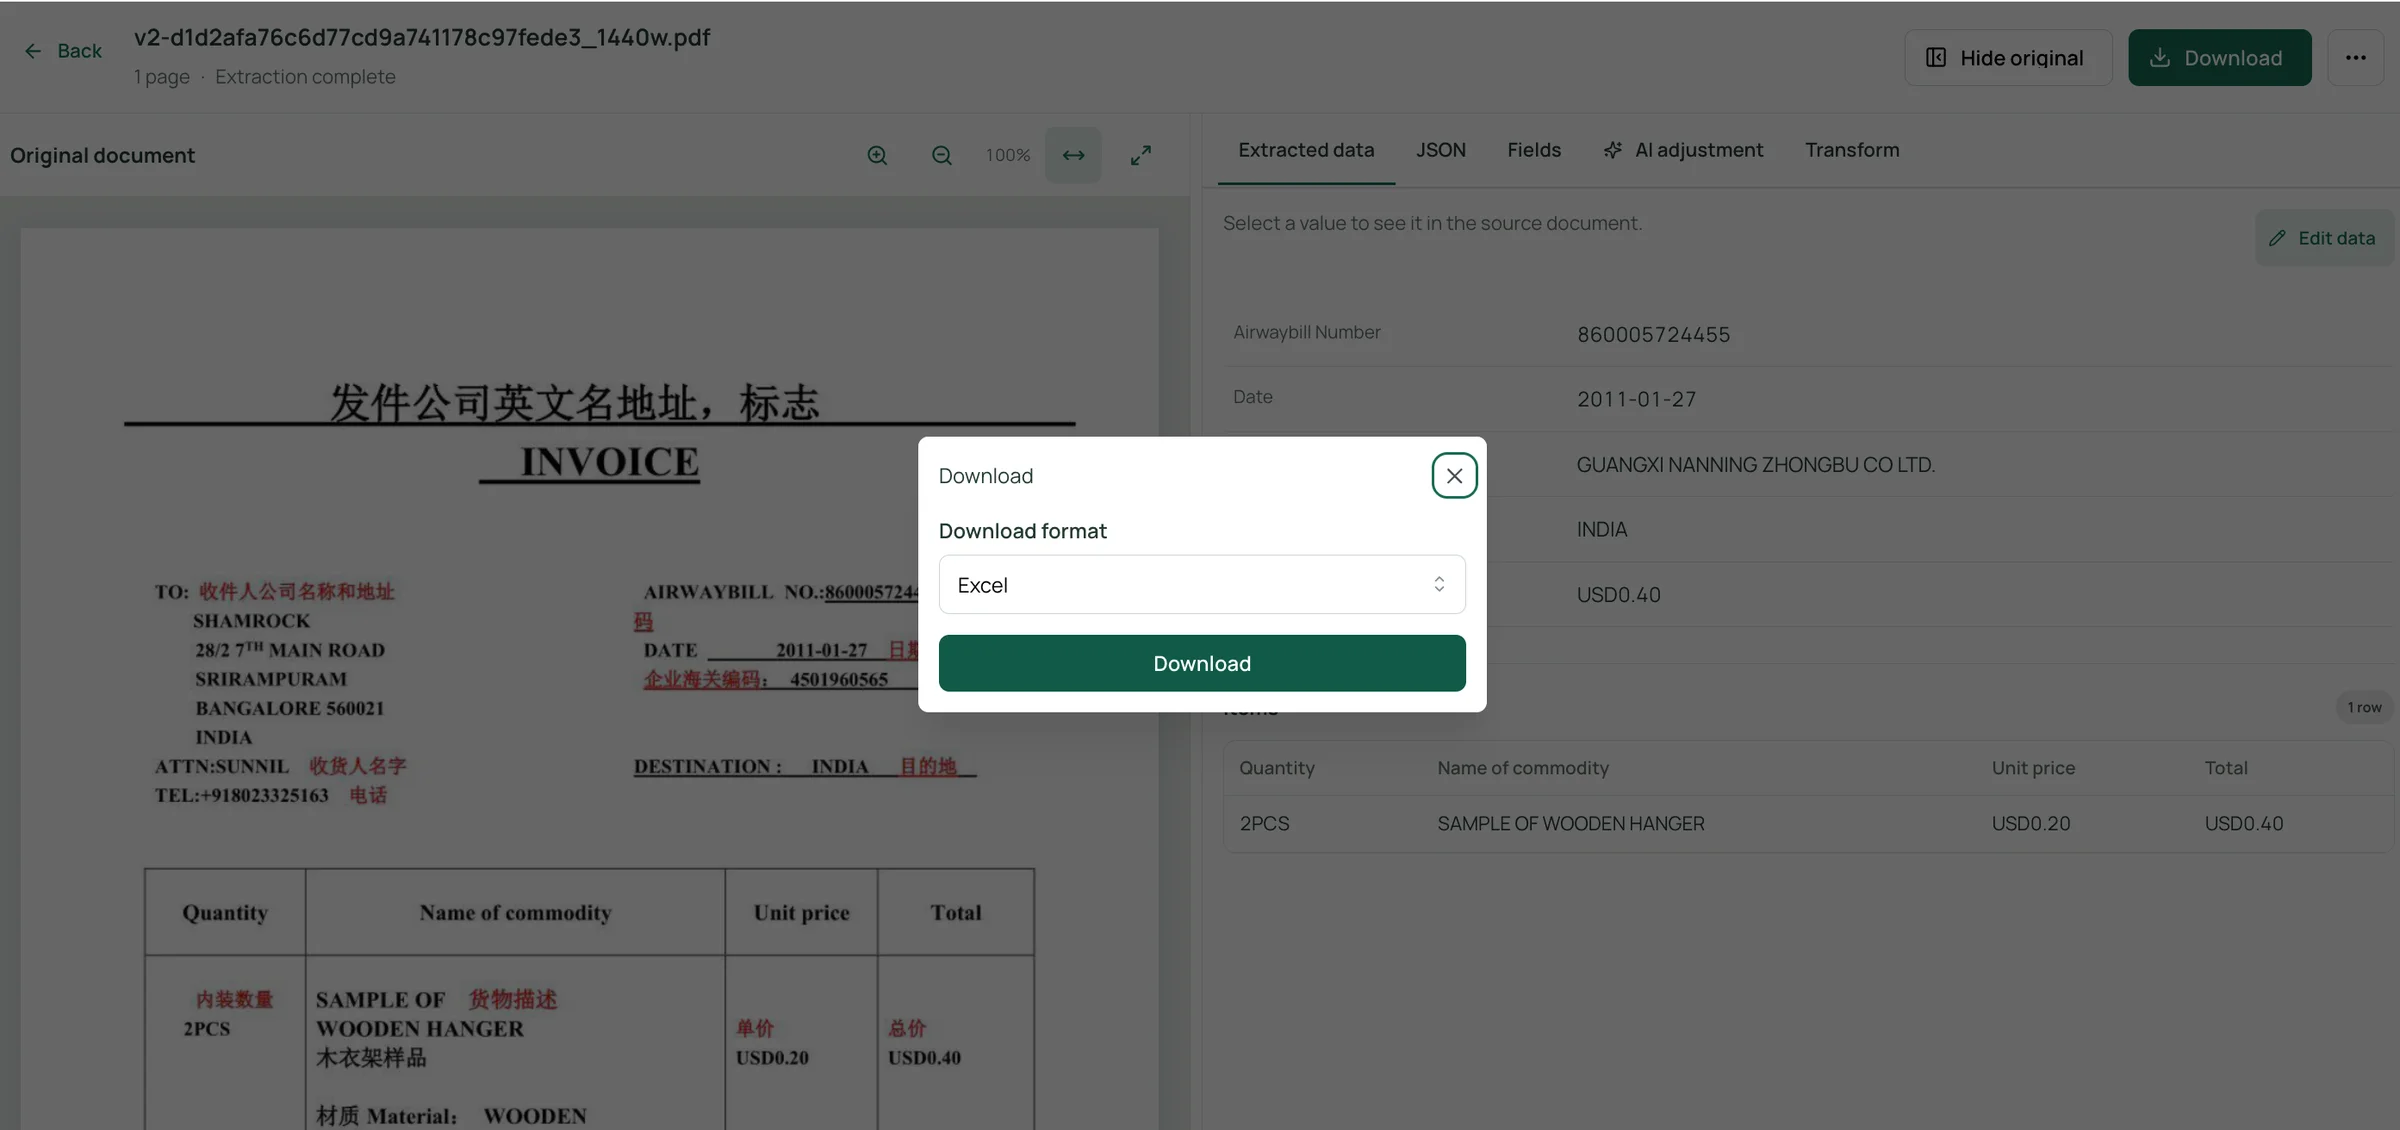
Click Download at the top right, choose Excel, then click Download in the dialog. Choose CSV instead if another app needs that format.
Step 4: Open the workbook
The supplied example has a Details sheet for the main information and an Items sheet for the product list. Your sheet names and columns may differ with the extraction setup.
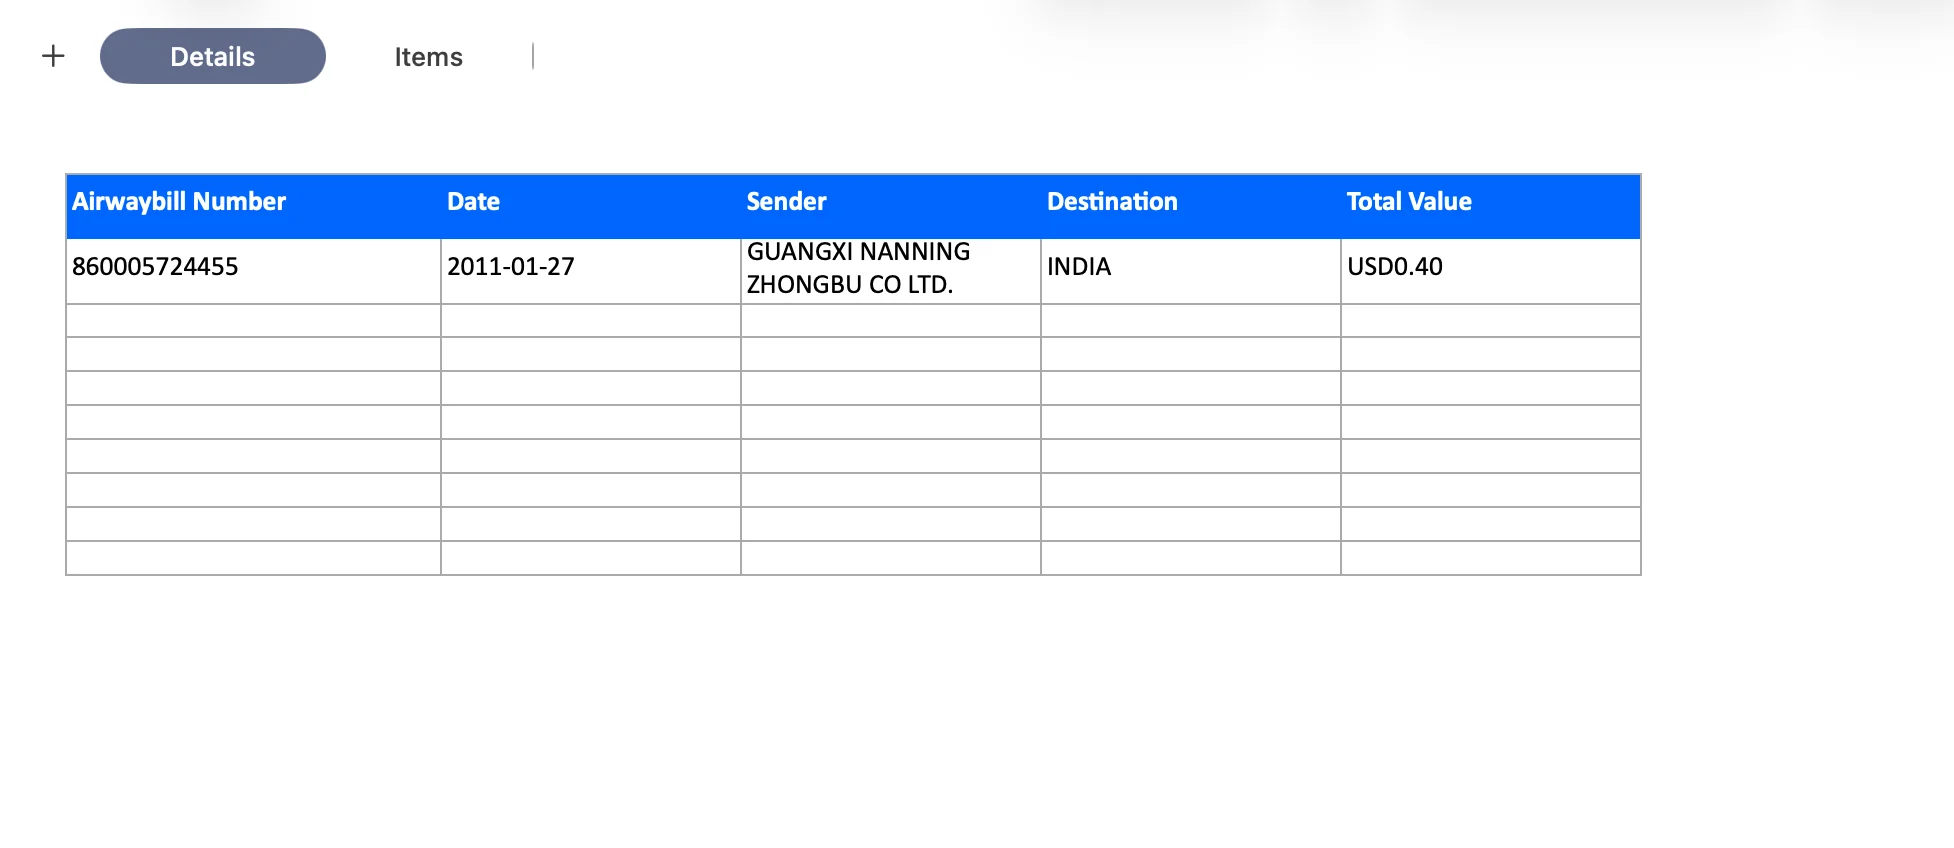
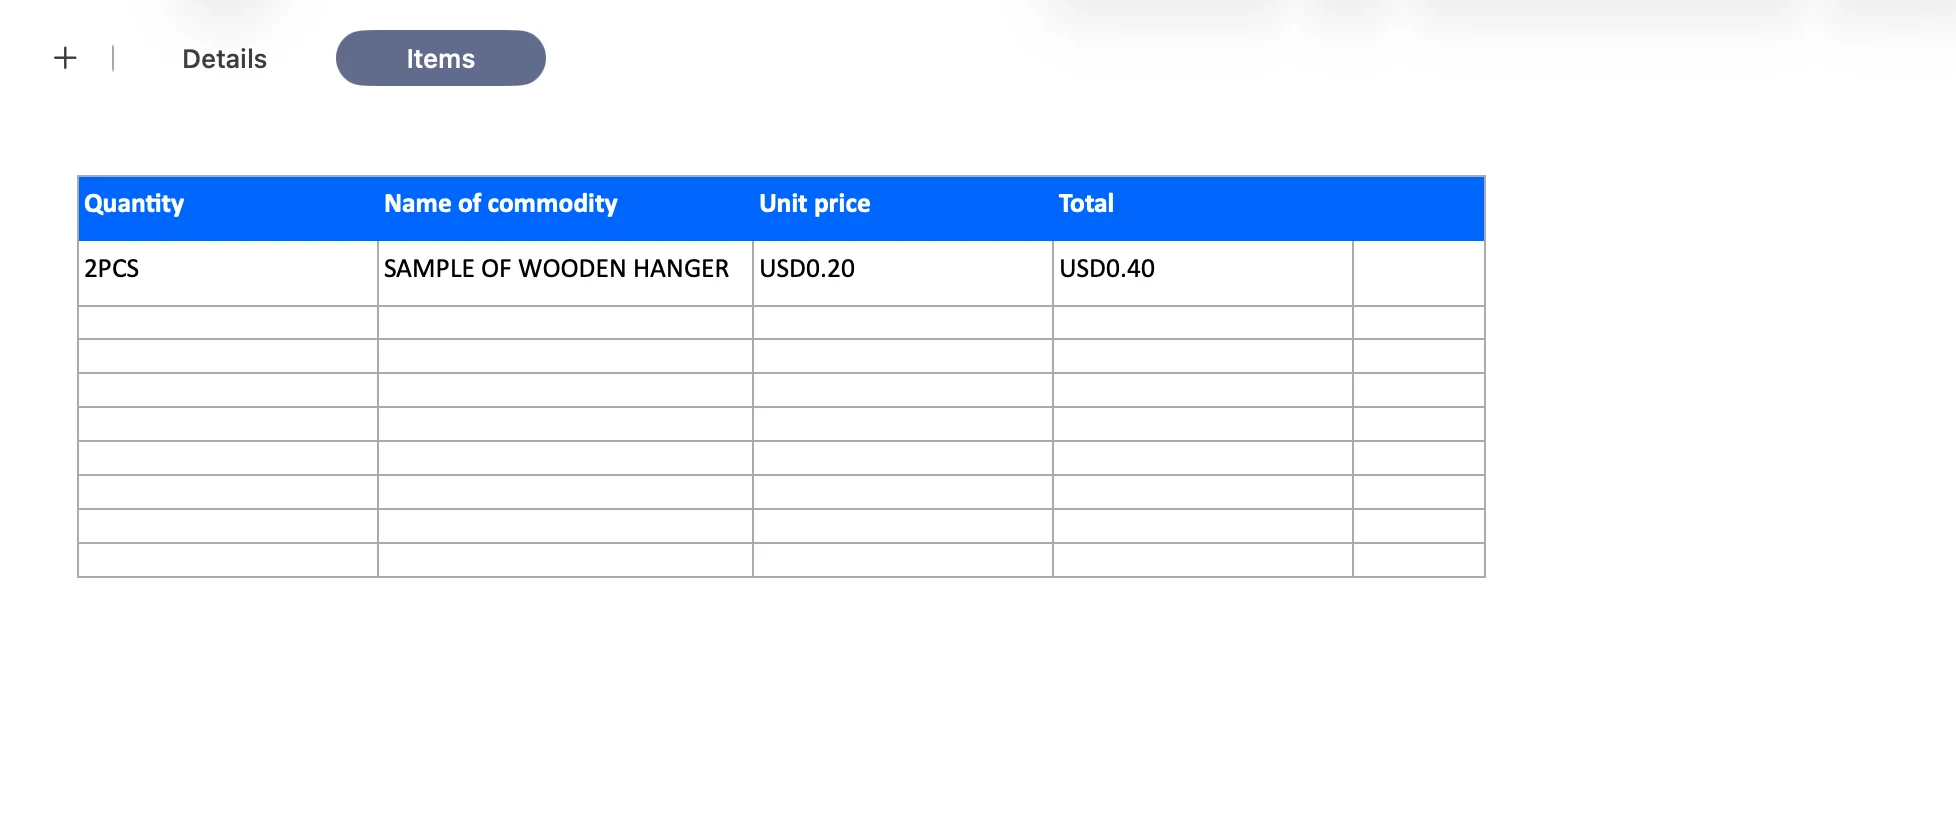
Check that all products are present and that reference numbers keep their leading zeros. If a cell contains 2PCS or USD0.20, separate the number from the unit or currency before adding amounts in Excel. Keep the original value for reference.
That's the basic conversion. The optional section below explains how to use the checked file in accounting software.
Before and After at a Glance
| Before: PDF invoice | After: Excel workbook | |
|---|---|---|
| Format | Image-like page with a bordered table | Two sheets with organized columns |
| Header data | Scattered across the page, mixed with annotation labels | One row on the Details sheet |
| Line items | Inside a printed table | One row per item on the Items sheet |
| Usable for sorting and totals | No spreadsheet columns | Organized columns; normalize numeric values before calculations |
| Source check | Manual | Click a value to see it in the original |
Optional: Use the File in QuickBooks, Xero, or Another Accounting Tool
After downloading, you can keep working in Excel or prepare the file for your accounting software. This guide uses a file export followed by an import in the receiving app. You do not need an API for these steps.
QuickBooks Online
First choose the right type of record: a supplier invoice you need to pay is usually a Bill; an invoice you send to a customer is a sales invoice.
- In QuickBooks, look for the import option for Bills and download its sample file, if your account provides it.
- Copy the checked invoice data into that file. Match supplier, bill number, dates, and amounts to the correct columns. Add the account category and tax code required by QuickBooks; they may not appear on the PDF.
- Upload the file, match each spreadsheet column to the QuickBooks label, and review the preview.
- Start with one bill. Check the supplier, total, tax, and bill number before importing more.
Availability depends on your region and subscription. Intuit's US guide currently limits the Bills data importer to Advanced and higher tiers. Its international bill-import guide describes a different set of supported plans and explains multi-line bills. Use the sample file and options shown in your own account. An exported list of products does not automatically become QuickBooks inventory items.
Xero
- Open Xero's bill-import option and download its CSV template.
- Copy your reviewed data into the template, keeping the required headings and checking supplier names, dates, accounts, and tax settings.
- Import a small test file, then review and approve the draft bills.
See Xero's bill-import instructions. UpParser's CSV may need rearranging to match that template.
Other accounting or ERP software
Use that system's import template and follow the same pattern: download the template, match the columns, test one record, and check the result. Check whether your edition accepts bills, sales invoices, or another record type before preparing the file.
Keep the original PDF for reference. Converting an invoice does not pay or approve it.
Handling More Than One Invoice
Start with a few files. Use the same column names for each invoice, check each result, and combine only the reviewed rows.
For a payment list, use one row per invoice. Keep product details in another sheet and add an invoice or source-file reference so you know where each row came from. Keep currencies separate when adding totals.
See how to convert multiple invoices to Excel or CSV for the full walkthrough.
Common Mistakes When Converting Invoices to Excel
- Converting the whole page as a table and ending up with main invoice details and line items in the same columns.
- Skipping the source check because the output "looks right."
- Treating a scan or photo like a text PDF.
- Exceeding file or page limits on a batch and not noticing which files failed.
- Forgetting to record which invoice each row came from.
Quick Checklist
- Upload the PDF, including a scanned PDF.
- Confirm that the main invoice details match the original.
- Confirm that the number of line items matches the original.
- Normalize quantities and amounts to numbers, with separate unit and currency fields.
- Reconcile line amounts to the invoice total after tax, discounts, shipping and rounding.
- Keep a shared invoice identifier in both sheets if combining multiple invoices.
- Download as Excel and check numeric, date and identifier cell types before using it.
- Save the setup if you will process similar invoices again.
FAQ
How do I convert a PDF invoice to Excel? Upload the PDF to a tool that extracts invoice data, check the extracted values against the original, and download the result as an Excel file. A tool that separates main invoice details from line items gives you a more usable spreadsheet than one that copies the page layout.
Can I convert a scanned invoice to Excel? Yes. The PDF to Excel tool supports scanned PDFs. Use a clear scan and check all extracted fields against the original. For a standalone image, choose an image-compatible tool and confirm its accepted formats.
How do I extract invoice data to Excel without retyping? Use an extraction tool that identifies each field, such as supplier, invoice number, date, tax, total and line items, then export to Excel. Check the result before using it, and compare the time needed with your current approach.
Can I convert many invoices at once? UpParser lists batch processing and reusable workflows. This walkthrough demonstrates one file, rather than a batch. Check current upload and batch limits, keep a shared invoice identifier across both sheets, and test several layouts before scaling up.
Do I need a template for every supplier? Start with a preset, adjust the fields to your needs, and save a successful workflow. Test it on each new supplier layout before relying on it.
What file types can I upload? For the PDF to Excel page, use a PDF, including a scanned PDF. Other UpParser tools support other document types; check the upload screen of the tool you choose.
Are my invoices private? Review the UpParser privacy policy and your account’s document controls before uploading confidential invoices.
Is it free to try? The pricing page lists 20 free pages each calendar month (UTC), with no card needed. Viewing, editing and exporting saved results do not use pages; choosing to re-extract a document uses pages again.
Try It on Your Own Invoice
Pick one invoice from your inbox or your folder and follow the same steps: upload, check the values beside the original, download, and open the workbook. Check numeric fields and identifiers before using the workbook for calculations or combining it with other exports. Use the free allowance to try a real invoice and inspect the workbook before processing more files.
About the Author
Dylan Dan is a document parsing and data processing specialist with years of hands-on experience. He helps readers extract, organize, and check data from invoices, bank statements, receipts, and other documents, turning document content into structured data that is easier to use.
Related Articles
- How to Extract Vendor Invoices into an Accounts Payable Spreadsheet — organize reviewed invoice data into an AP tracker.
- Common Invoice OCR Errors and How to Fix Them — troubleshoot dates, amounts and missing line items.
- How to Automate Invoice Data Extraction — build a repeatable workflow around tested fields and review.